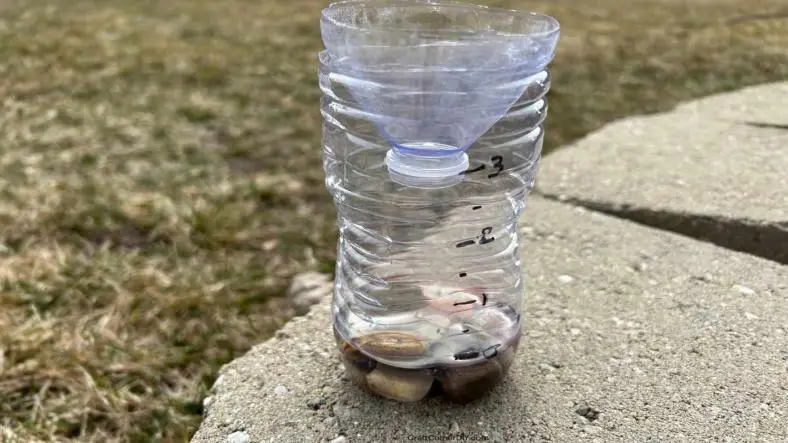
Creating a DIY rain gauge is a fantastic science experiment for children to understand meteorology and hydrology. A rain gauge measures the amount of precipitation that falls over a period of time. This simple project allows children to observe and record rainfall, helping them learn about weather patterns and data collection. Here’s a step-by-step guide to making a basic rain gauge.
Materials Needed:
- Clear Plastic Bottle: A 2-liter soda bottle or similar size.
- Scissors: For cutting the bottle.
- Ruler: For measuring and marking.
- Permanent Marker: For marking measurements on the bottle.
- Plastic Cup or Small Container: To catch the rain (if needed).
- Tape: To secure parts together.
- Optional: Funnel: To direct rain into the bottle more easily.
Step-by-Step Guide:
1. Prepare the Bottle:
- Clean the Bottle: Rinse out the plastic bottle to remove any residue or labels.
- Cut the Bottle: Using scissors, carefully cut the top off the bottle just below the neck. This creates a funnel-like shape that can be inverted and placed back into the bottle to catch rain.
2. Create the Funnel:
- Invert the Top: Take the top part of the bottle (the part you cut off) and invert it so that it acts as a funnel. Insert it into the bottom part of the bottle. This will direct rain into the bottle and prevent debris from entering.
- Secure the Funnel: Use tape to secure the funnel part inside the base of the bottle. Ensure it is well-sealed to avoid any leaks.
3. Mark the Measurements:
- Mark Measurement Levels: Using a ruler and a permanent marker, mark measurement levels on the outside of the bottle. You can start with 0 cm at the bottom and mark intervals (e.g., 1 cm, 2 cm, etc.). This will allow you to measure the depth of rainfall in centimeters or inches.
- Label the Bottle: Optionally, label the bottle with the current date or month to track when measurements are taken.
4. Set Up the Rain Gauge:
- Position the Rain Gauge: Place the rain gauge in an open area where it will be exposed to rainfall. Avoid locations under trees or roofs where rain might be obstructed.
- Secure the Gauge: Ensure the gauge is stable and will not tip over. You can use tape or weights to secure it to the ground if necessary.
5. Measure and Record Rainfall:
- Collect Rainfall: After a rainfall, check the level of water collected in the bottle. Record the measurement based on the markings.
- Analyze Data: Track and analyze the amount of rainfall over time. Compare measurements from different days or weeks to understand precipitation patterns.
- Discuss Findings: Discuss how different weather conditions affect rainfall and how this data can be used to understand local weather patterns.
6. Optional Enhancements:
- Add a Funnel: For more precise measurements, you can use a funnel (made from paper or plastic) to ensure that all rainwater is directed into the gauge.
- Create a Calibration Chart: Make a calibration chart to convert the depth of water in the gauge into measurements of rainfall in millimeters or inches.
- Build a Rain Gauge Stand: Construct a simple stand for the rain gauge using stakes or a small platform to keep it upright and steady.
Scientific Concepts Explored:
- Meteorology: Understanding how precipitation is measured and recorded.
- Data Collection: Learning how to collect and interpret weather data.
- Hydrology: Exploring the water cycle and how rainfall contributes to it.
Tips for Success:
- Check Regularly: Regularly check and empty the rain gauge to ensure accurate measurements.
- Avoid Contamination: Keep the rain gauge clean and free from debris.
- Record Data: Maintain a log to track rainfall over time and observe patterns.
Safety Considerations:
- Use Scissors Carefully: Supervise children when using scissors to avoid cuts.
- Secure Placement: Ensure the rain gauge is placed where it won’t pose a tripping hazard or be knocked over.
Conclusion:
Creating a DIY rain gauge is an engaging way for children to learn about weather measurement and data collection. By making and using their own rain gauges, children gain hands-on experience with scientific concepts and develop skills in observation and recording. This project not only provides educational value but also encourages an interest in meteorology and environmental science.
Thanks for reading the article, for more Science and Technology related articles read and subscribe to peoples blog articles.


