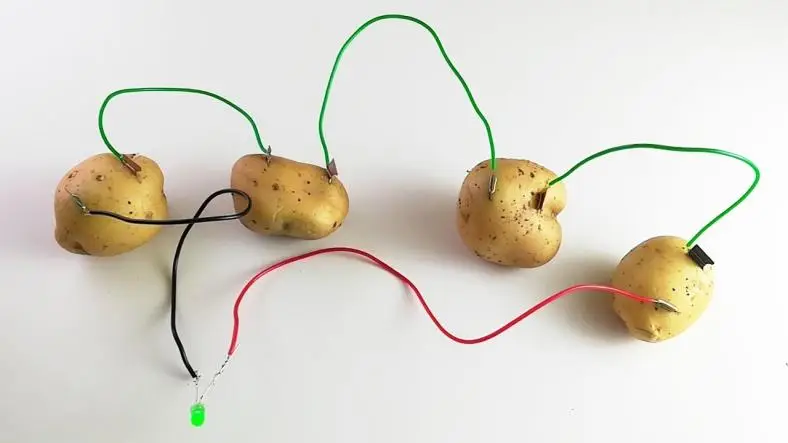
Creating a DIY potato battery is a fascinating and educational experiment that demonstrates the basics of electrochemical cells and how chemical energy can be converted into electrical energy.
Here's a step-by-step guide to building a potato battery using zinc and copper electrodes:
Materials Needed:
- Potatoes: 2-3 medium-sized potatoes (or more if you want to create a battery with higher voltage).
- Zinc Electrodes: Zinc-coated nails or galvanized nails (one for each potato).
- Copper Electrodes: Copper coins or copper wire (one for each potato).
- Wires with Alligator Clips: To connect the electrodes and make the electrical circuit.
- Multimeter or Small LED: To measure the voltage generated or to test the circuit.
Procedure:
- Prepare the Potatoes: Wash and dry the potatoes to remove any dirt or moisture that might affect the experiment.
- Insert Electrodes:
- Insert one zinc electrode into each potato. Ensure that the electrode goes in far enough to make good contact with the potato's interior.
- Insert one copper electrode into each potato, but keep it separate from the zinc electrode. The copper electrode should be placed at a different point in the potato from the zinc electrode.
- Connect the Electrodes:
- Use wires with alligator clips to connect the copper electrode of one potato to the zinc electrode of the next potato in the series. This series connection is necessary to increase the total voltage.
- Continue connecting the electrodes from potato to potato until all potatoes are connected in series.
- Complete the Circuit: Connect the free copper electrode of the first potato to one terminal of a multimeter or LED. Connect the free zinc electrode of the last potato to the other terminal of the multimeter or LED.
- Measure the Voltage (Optional): If using a multimeter, set it to measure voltage. The multimeter should show a voltage reading indicating the electrical output of your potato battery.
- Test the LED (Optional): If using an LED, observe if the LED lights up. It may be dim or not light up significantly, as the voltage and current generated by a potato battery are relatively low.
Scientific Explanation:
- Electrochemical Reaction: The potato battery functions as a simple electrochemical cell. The potato itself contains phosphoric acid, which reacts with the electrodes.
- Zinc Electrode: Acts as the anode (negative terminal) where oxidation occurs. Zinc loses electrons during the reaction.
- Copper Electrode: Acts as the cathode (positive terminal) where reduction occurs. The electrons flow through the circuit from the zinc electrode to the copper electrode.
- Electricity Generation: The flow of electrons from the zinc to the copper electrode through the external circuit generates an electric current. This current can be used to power small electronic devices or measured using a multimeter.
Tips for Success:
- Use Fresh Potatoes: Fresh potatoes provide the best electrolyte solution for the reaction. Older or dried potatoes may not work as effectively.
- Ensure Good Contact: Make sure the electrodes are properly inserted and making good contact with the potato to maximize the efficiency of the battery.
- Series Connection: Connecting multiple potatoes in series increases the total voltage. If you need more power, consider using more potatoes.
Safety Considerations:
- Handle Electrodes Carefully: Avoid contact with the tips of the electrodes to prevent injury.
- Avoid Short Circuits: Ensure that the electrodes do not touch each other directly, which could create a short circuit and potentially damage your multimeter or LED.
Conclusion:
A DIY potato battery is a fun and educational project that illustrates the principles of electrochemistry and electricity generation. By using simple materials like potatoes and common electrodes, you can create a basic battery and understand the fundamental processes involved in generating electrical power.
Thanks for reading the article, for more Science and Technology related articles read and subscribe to peoples blog articles.


