Caching is a fundamental technique used in software development to enhance performance and efficiency by storing frequently accessed data in a temporary storage layer. In PHP 8, caching can significantly reduce load times and improve the overall user experience of web applications.
This article will provide an overview of caching, its benefits, and common use cases.
What is Caching?
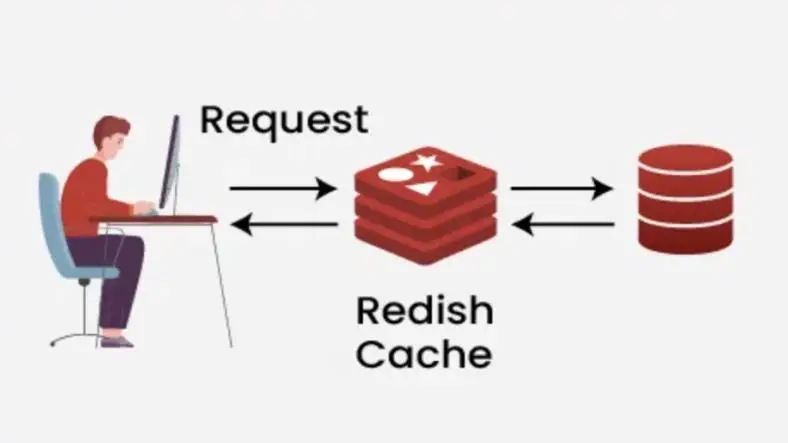
Caching involves storing copies of files, data, or results of expensive computations in a cache—typically a fast-access memory storage. When a request for data is made, the application first checks the cache to see if the data is available. If found, this is known as a cache hit; if not, the application retrieves the data from the original source (like a database or an API) and stores it in the cache for future requests.
Benefits of Caching
- Improved Performance: Caching dramatically speeds up data retrieval. By serving requests from memory rather than fetching them from slower data sources, applications can provide faster response times, leading to a smoother user experience.
- Reduced Load on Data Sources:
- By caching data, you decrease the frequency of requests sent to databases or external APIs.
- This reduction in load can prevent bottlenecks, especially during peak traffic periods, and improves overall system reliability.
- Cost Efficiency: For cloud-based services, caching can reduce operational costs by minimizing the number of read operations on databases, which are often charged based on usage.
- Scalability:
- Caching allows applications to handle a higher number of concurrent users and requests.
- This scalability is crucial for applications experiencing rapid growth or high traffic.
- Enhanced User Experience:
- Faster response times directly correlate with better user experiences.
- Users are less likely to abandon applications that respond quickly, which can lead to higher engagement and satisfaction.
Common Use Cases for Caching
- Web Application Data: Caching frequently accessed data, such as user sessions or profile information, can improve the performance of web applications, allowing them to respond quickly to user requests.
- API Responses: In scenarios where applications consume external APIs, caching the responses can reduce latency and API call costs. For example, a news application can cache articles to serve users faster.
- Database Query Results:
- By caching the results of common database queries, applications can reduce the load on databases and decrease the time taken to generate responses.
- This is particularly effective for read-heavy applications
- Static Content:
- Static assets like images, stylesheets, and scripts are often cached to enhance website performance.
- Caching these assets reduces the time it takes to load pages.
- Machine Learning Predictions: In applications utilizing machine learning models, caching the predictions can save computation time and resources, allowing for quicker responses in scenarios like real-time data processing.
Caching is an essential technique in modern web development, particularly in PHP 8 applications. By understanding the benefits and use cases of caching, developers can implement effective caching strategies that improve performance, reduce costs, and enhance user experiences. As applications continue to scale and evolve, caching will remain a vital component of efficient software architecture.
Setting Up Redis in PHP 8 with DDEV
Redis is a powerful in-memory data structure store commonly used as a caching layer, message broker, and for session management. Integrating Redis with PHP 8 can significantly enhance application performance by reducing data retrieval times and offloading work from your primary database. In this article, we'll walk through the steps to set up Redis in PHP 8.
By leveraging DDEV, you can easily integrate Redis into your PHP 8 applications. In this article, we’ll go through the steps to set up Redis in a DDEV environment.
Prerequisites
Before you begin, ensure you have the following installed:
- DDEV: Make sure you have DDEV installed on your machine. You can follow the official installation guide if you haven't installed it yet.
- PHP 8: Ensure your DDEV project is configured to use PHP 8.
Step 1: Create a New DDEV Project
If you don’t have an existing DDEV project, you can create a new one. Open your terminal and run the following commands:
ddev config
Follow the prompts to set up your project. Once configured, start your DDEV environment:
ddev start
Step 2: Add Redis to Your DDEV Project
DDEV makes it easy to add services like Redis. To enable Redis, you can use the ddev command:
ddev add-service redis
This command will automatically configure Redis for your project, If not added, alternatively you can setup using below steps
- Under the
.ddevfolder, create a file with the namedocker-compose.override.yml. - Add the below code into the file
docker-compose.override.ymland then runddev restart
version: '3.6'
services:
redis:
image: redis:latest
container_name: day15-ddev-php-redis
ports:
- "6379:6379"
networks:
- ddev_default
volumes:
- redis_data:/data
volumes:
redis_data:
driver: local
Step 3: Access Redis
After adding Redis, you can connect to it using the hostname provided by DDEV, typically redis within your DDEV environment. You can also access the Redis CLI using:
ddev ssh
redis-cli
Step 4: Install a Redis Client for PHP
Google Ad 1
If you plan to use the Redis extension directly, you can install it through DDEV's environment. However, a popular alternative is to use predis/predis, which is a flexible Redis client for PHP.
Install it using Composer within your DDEV environment:
ddev composer require predis/predis
Step 5: Connecting to Redis in PHP
Now that you have Redis and a client library set up, you can create a simple PHP script to interact with Redis. Create a new PHP file (e.g., redis-example.php) in your project’s web directory.
Example Code
require 'vendor/autoload.php';
use Predis\Client;
// Create a Redis client instance
$client = new Client(['host' => 'redis', 'port' => 6379]);
// Test the connection
try {
$client→ping();
echo "Connected to Redis successfully!\n";
// Set a value
$client→set('key', 'Hello, Redis!');
// Get the value
$value = $client→get('key');
echo "Value from Redis: $value\n"; // Outputs: Hello, Redis!
} catch (Exception $e) {
echo "Could not connect to Redis: " . $e→getMessage() . "\n";
}
Step 6: Running Your PHP Script
To run your PHP script, you can access it through your web browser at http://.ddev.site/redis-example.php or run it from the command line within the DDEV environment:
ddev exec php redis-example.php
Step 7: Monitoring Redis
You can monitor Redis directly from the command line within your DDEV environment. Use the Redis CLI to check the status and metrics:
ddev ssh
redis-cli info
This command provides insights into memory usage, connected clients, and more.
Conclusion
Setting up Redis in a PHP 8 application using DDEV is straightforward and efficient. By leveraging DDEV’s capabilities, you can easily integrate Redis into your development workflow, enabling faster data access and improved application performance.
With this article, you should be able to set up and utilize Redis in your PHP applications effectively.
Thanks for reading the article, for more Science and Technology related articles read and subscribe to peoples blog articles.


