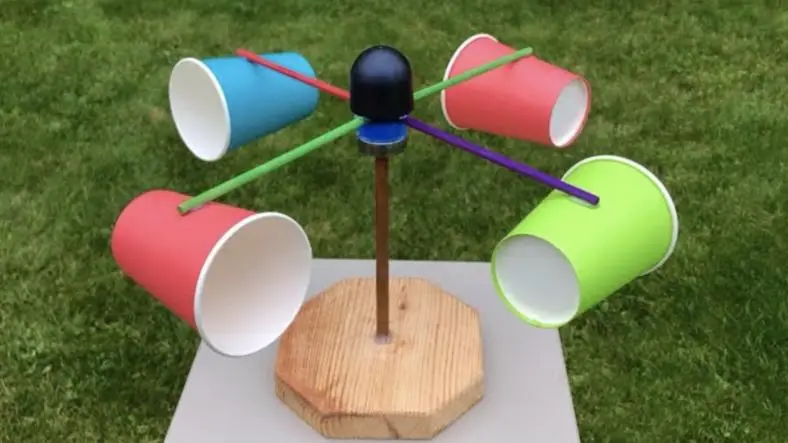
Building a simple anemometer is a fun and educational science experiment that allows children to measure the wind speed and understand how wind speed is quantified. By defination, an anemometer is a device that measures wind velocity by counting number of times its blades spin in a given time period.
Here's a step-by-step process for creating a basic anemometer using everyday materials:
Materials Needed:
- Paper Cups: 4 (for the cups of the anemometer).
- Plastic Straw: 1 (for the central axle).
- Pencil with an Eraser: 1 (to serve as a base).
- Straight Pin: 1 or 2 (to attach the cups to the straw).
- Scissors: For cutting materials.
- Tape or Glue: For securing components.
- Protractor: Optional, for measuring angles.
- Ruler: For measuring distances.
- Marker or Pen: For marking and labeling.
Procedure:
- Prepare the Cups: Take all the four of the paper cups, make a small hole in the bottom of each cup. The holes should be centered and they should be just large enough for the pin to pass through.
- Prepare the Straw:
- Cut the plastic straw with the length of about 6-8 inches. This will serve as the central axle of the anemometer.
- Use scissors to cut two slits halfway down the straw, creating a cross shape. These slits will help to stabilize the straw when it's attached to the pencil.
- Attach the Cups to the Straw:
- Arrange the cups around the straw so that they are evenly spaced. Each cup should be positioned at 90-degree angles to the others.
- Insert a straight pin through the center hole of each cup and then through the cross-shaped cuts in the straw. Space the cups so they are at equal distances from the center. Use tape or glue to secure the cups in place if needed.
- Attach the Straw to the Pencil: Insert one end of the straw into the eraser end of the pencil. The pencil acts as the base and the handle for holding the anemometer. Secure the straw in place with tape or glue if needed.
- Test the Anemometer:
- Hold the anemometer by the pencil and expose it to the wind. The cups should begin to spin when there is wind. Observe the rotation to gauge wind speed.
- Count the number of rotations the cups make in a specific time period (e.g., 30 seconds). This will help you estimate the wind speed. You can use a stopwatch or timer to measure the time.
- Measure and Record Data:
- To calculate the wind speed, you can use the number of rotations per minute (RPM). Compare the results with a known wind speed chart or use them to estimate wind speed relative to other measurements.
- For a more detailed analysis, record your findings and plot them on a graph to visualize how wind speed changes over time.
Scientific Explanation:
- Wind Speed Measurement: The anemometer measures wind speed based on the rotation of its cups. The faster the wind blows, the faster the cups spin.
- Principle of Operation: As the wind strikes the cups, it causes them to spin around the central axis. The number of spins (or rotations) correlates with the wind speed. By counting the rotations, you can estimate how fast the wind is blowing.
Tips for Success:
- Make sure the cups are evenly spaced and balanced around the straw to avoid wobbling or inaccurate measurements.
- Lighter cups and straws will spin more easily in light winds, making it easier to measure low wind speeds.
- To get accurate readings, hold the anemometer steady in the wind or mount it on a stable stand.
Safety Considerations:
- Use scissors and pins with caution to avoid injuries.
- If possible, test the anemometer in moderate wind conditions to prevent damage or difficulty in handling.
Building and using a simple anemometer is a hands-on way to explore wind speed and gain a better understanding of meteorological principles. By creating this basic device, children can learn about wind energy, measurement techniques and data analysis in a fun and interactive manner. This experiment fosters curiosity about weather phenomena and encourages scientific inquiry.
Thanks for reading the article, for more Science and Technology related articles read and subscribe to peoples blog articles.


