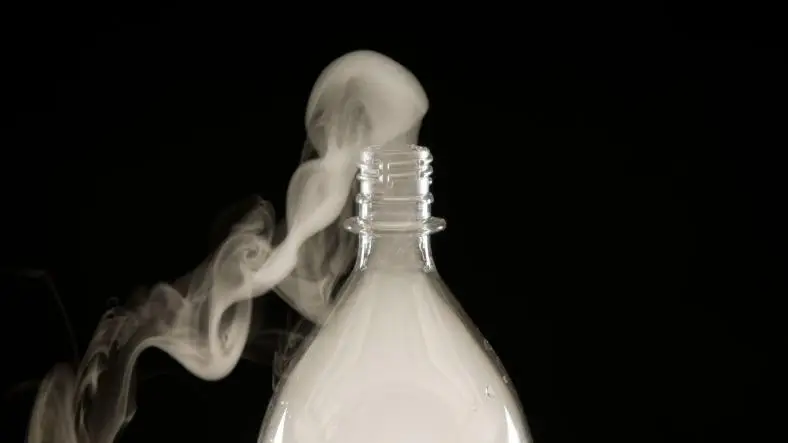
Creating a cloud in a bottle is a fantastic and visually engaging science experiment that demonstrates the basic principles of cloud formation. This simple experiment uses everyday materials to mimic the process of cloud formation in a controlled environment.
Here’s a step-by-step guide to performing the “Cloud in a Bottle” experiment:
Materials Needed:
- Plastic Bottle: A clear plastic bottle with a tight-sealing cap.
- Hot Water: To create warm, moist air inside the bottle.
- Ice Cubes: To create a temperature difference and cool the air inside the bottle.
- Matches or a Lighter: To create smoke particles in the bottle (you can also use a burning piece of paper if matches are not available).
- Rubber Band: To seal the bottle cap tightly (if needed).
- Small Pan or Cup: To heat the water.
Procedure:
- Heat the Water:
- Heat some water in a small pan or cup until it’s boiling.
- This will create steam, which is crucial for the experiment.
- Prepare the Bottle:
- Add Hot Water:
- Pour a small amount of hot water into the plastic bottle.
- Swirl the water around to coat the inside of the bottle with steam.
- This will add moisture to the air inside the bottle.
- Seal the Bottle: Carefully pour out any excess water and immediately seal the bottle with the cap while it is still warm and full of steam.
- Add Hot Water:
- Create Smoke Particles:
- Add Smoke:
- Light a match and hold it inside the bottle for a few seconds to create some smoke.
- Quickly blow out the match and drop it into the bottle, then seal it tightly with the cap.
- Alternatively, you can use a burning piece of paper to produce smoke.
- Smoke Particles: The smoke particles serve as nuclei for the water droplets to form around.
- Add Smoke:
- Cool the Bottle:
- Apply Ice:
- Place ice cubes on top of the bottle cap.
- The ice helps to cool the air inside the bottle, simulating the cooling process in the atmosphere that leads to cloud formation.
- Observe the Cloud:
- After a few moments, you should see a cloud forming inside the bottle.
- This cloud consists of tiny water droplets that have condensed around the smoke particles.
- Apply Ice:
- Create a Cloud:
- To create a more pronounced effect, gently squeeze the sides of the bottle.
- This decreases the pressure inside, which can help to make the cloud more visible.
- Release the pressure to see the cloud dissipate.
Scientific Explanation:
- Cloud Formation:
- In the atmosphere, clouds form when warm, moist air rises and cools.
- As the air cools, it loses its capacity to hold water vapor, which condenses into tiny droplets around particles such as dust or smoke.
- These droplets cluster together to form a cloud.
- Role of Smoke Particles: The smoke particles in the bottle act as condensation nuclei, around which water vapor condenses to form visible water droplets.
- Temperature and Pressure:
- The warm water creates moist air, while the ice cools the air and causes it to condense.
- The squeezing of the bottle simulates changes in air pressure, aiding in cloud formation.
Tips for Success:
- Seal Quickly: Ensure the bottle is sealed tightly after adding the smoke and hot water to prevent steam from escaping.
- Smoke Generation: Adding smoke is essential for cloud formation; without it, you may not see a clear cloud form.
- Handle Carefully: Use caution when handling hot water and matches or lighters.
Safety Considerations:
- Handle Matches Carefully: Supervise children closely when using matches or a lighter to prevent burns or accidents.
- Hot Water Safety: Be careful when pouring hot water to avoid burns. Allow the water to cool slightly if necessary.
The “Cloud in a Bottle” experiment provides a clear and engaging demonstration of how clouds form in the atmosphere. By simulating the conditions that lead to cloud formation, children can visualize and understand this natural process. This experiment is a great way to introduce basic meteorological concepts and foster a greater interest in science.
Thanks for reading the article, for more Science and Technology related articles read and subscribe to peoples blog articles.


